paleoart

Polacanthus Reconstruction: Part 11 ‘Caudal Spines’


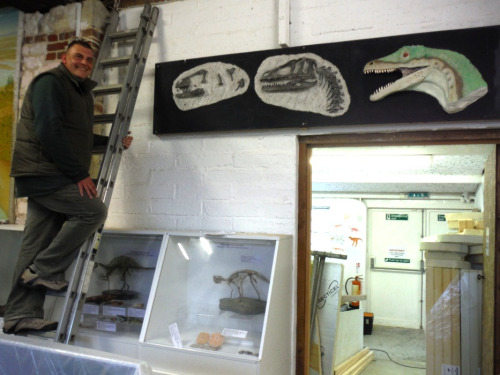
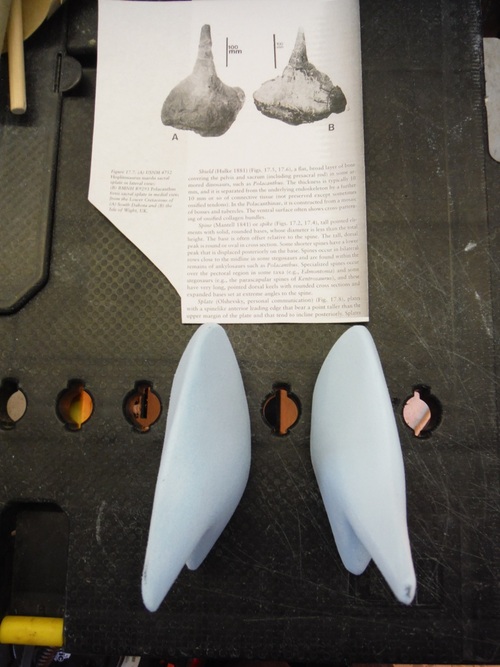
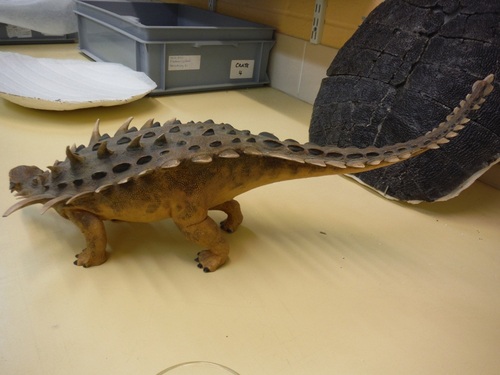
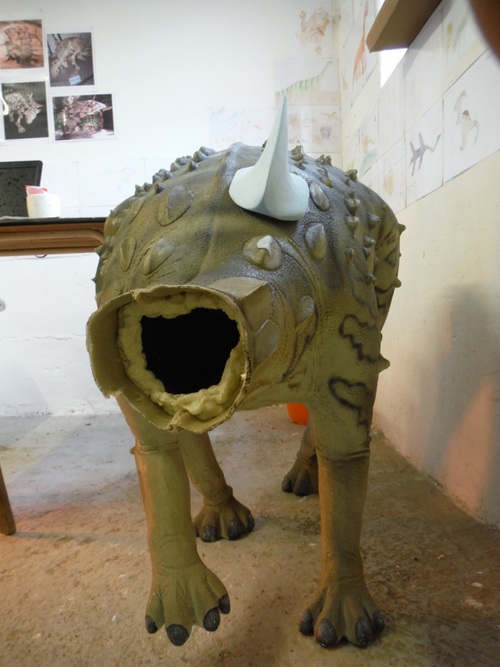
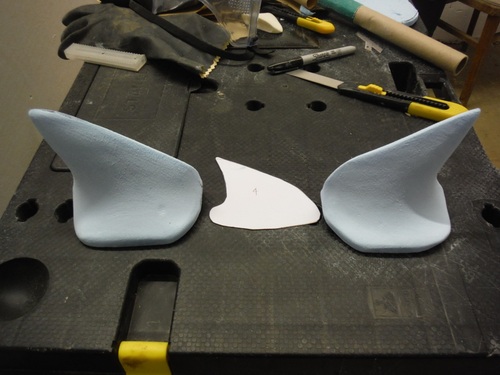
Previously I wrote about sculpting a pair of the enigmatic ‘Splate’ spines. Something I will be returning to later. With a pair of Polacanthine Splates finished, the next job was to sculpt all the spines of the tail.

Based on a couple of different interpretations I needed to sculpt between 22-24 Caudal Spines, now that’s a lot of spines! Fortunately they get smaller towards the end the tail.

image

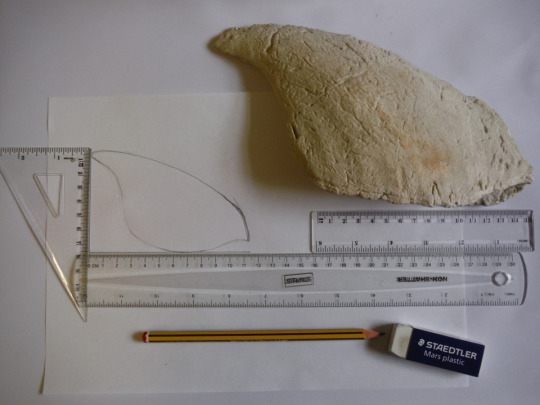
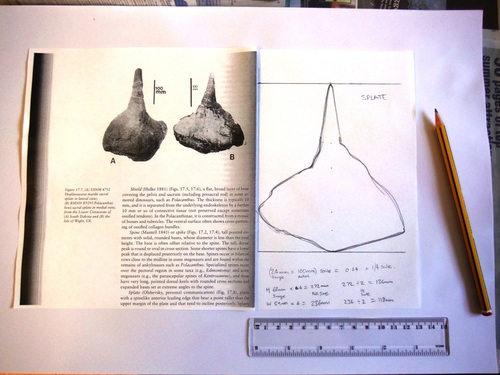
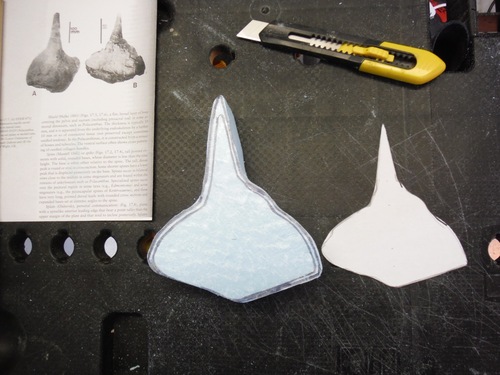
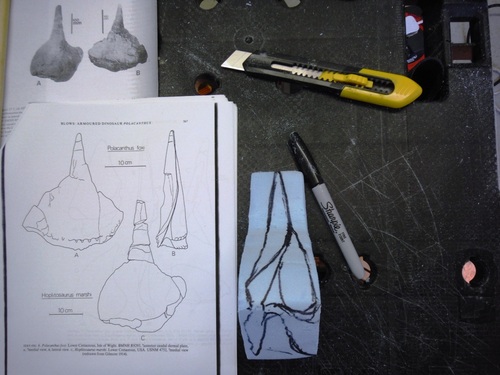
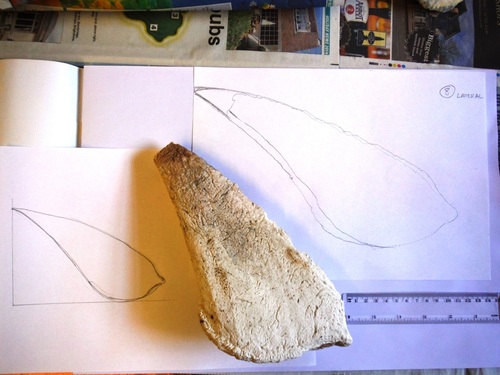
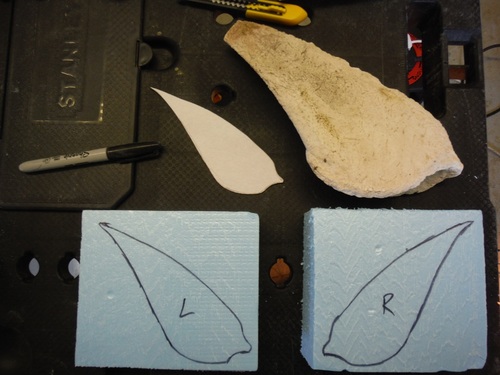
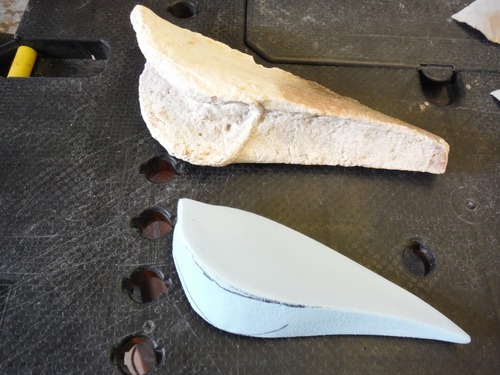
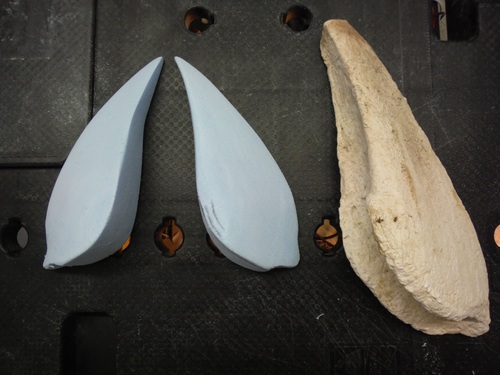
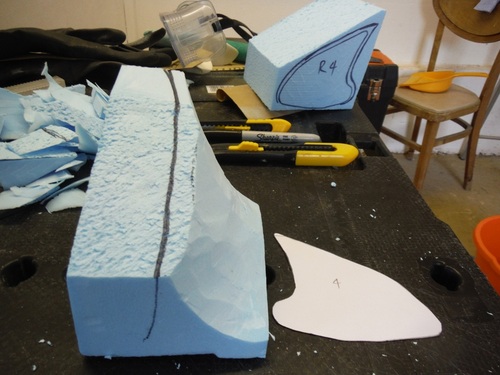
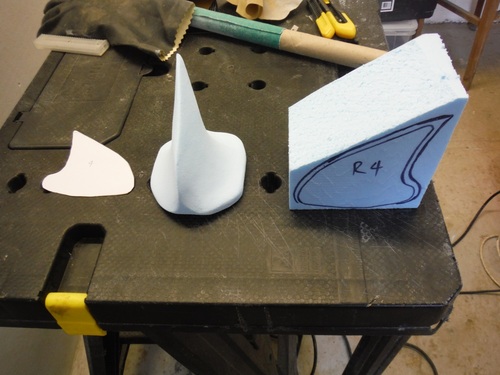
Unlike the ‘Splate’ I do have a cast of an (early to middle) tail spine to refer too. So I measured the spine and drew it at just over half scale to make a template.

image

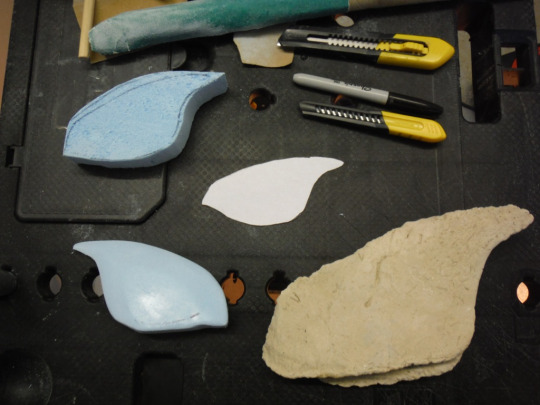
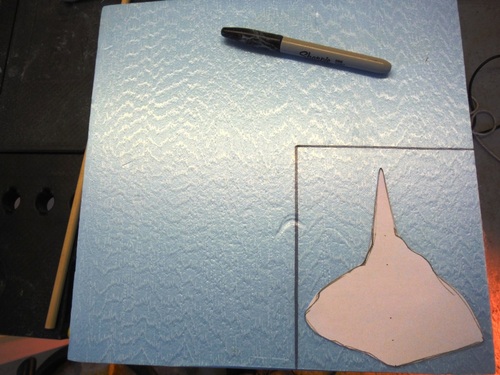
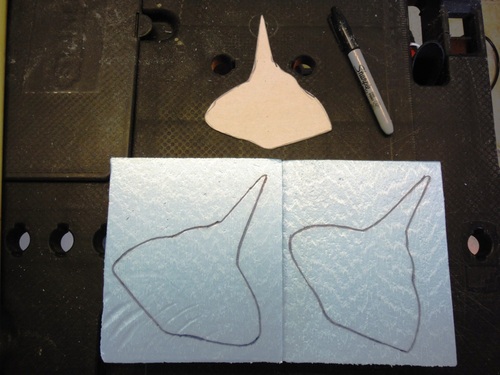
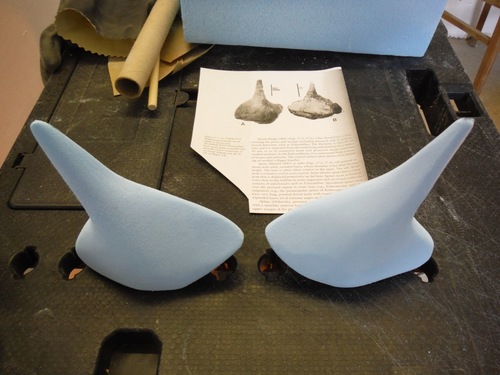
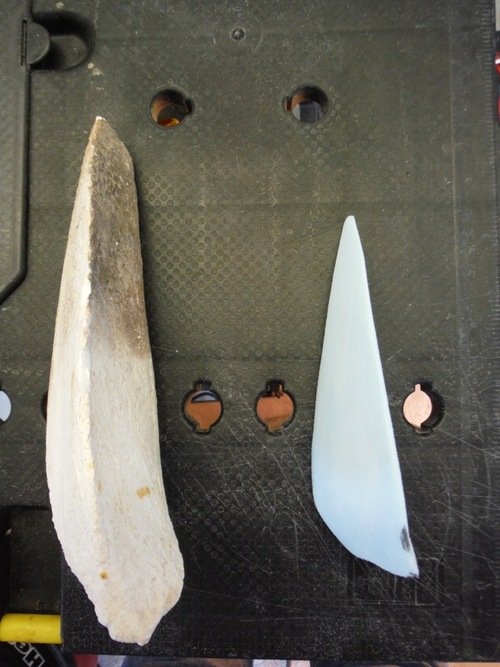
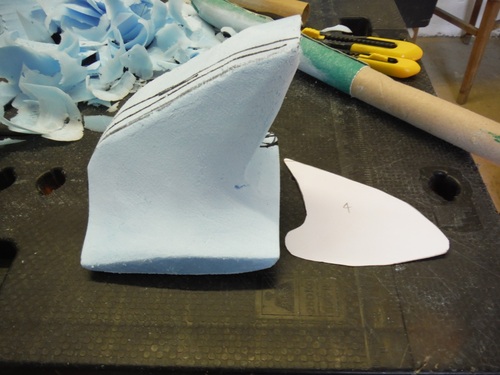
With the outline marked on the extruded polystyrene I cut the shape out and started to carve the spine.

image

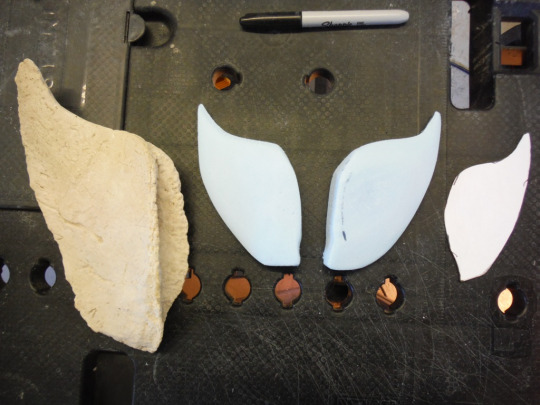
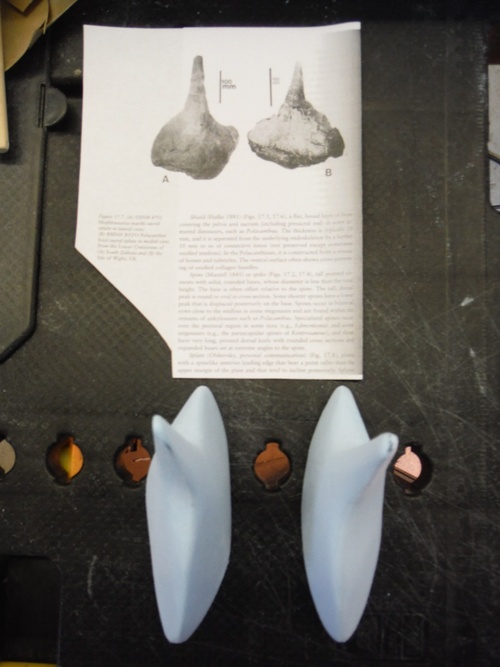
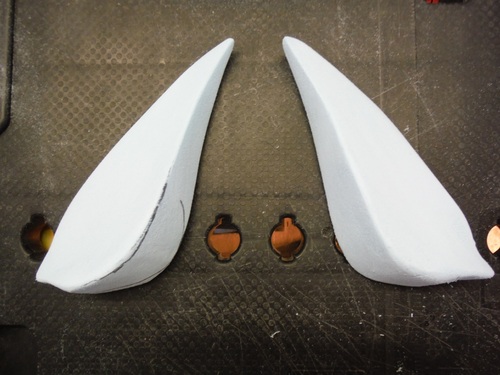
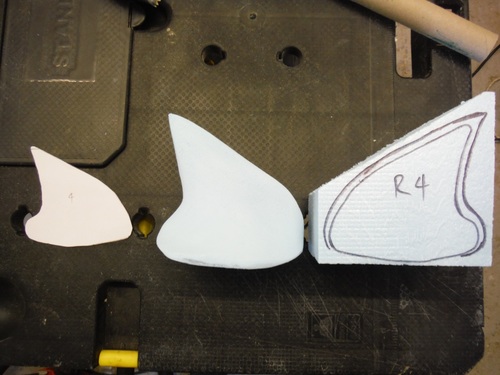
Once the first spine was finished I carved the other spine of the pair.

image

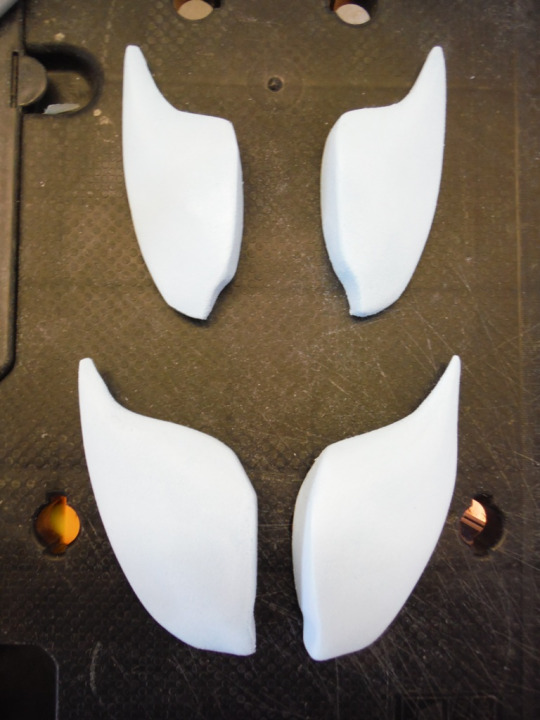
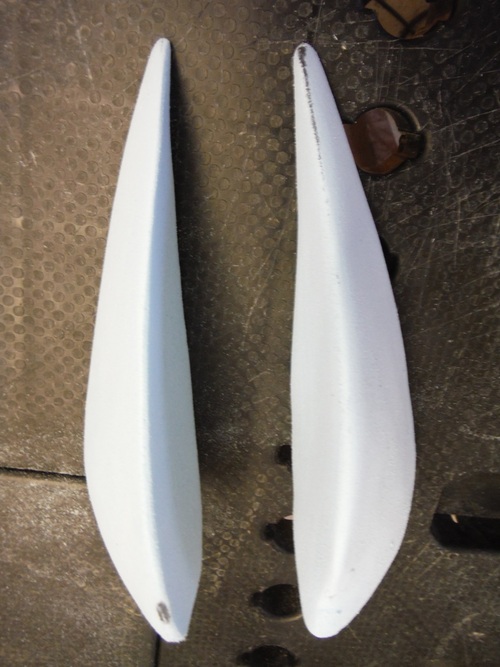
With the first pair of Caudal Spines finished I repeated the process by sculpting the second pair of spines (using the first pair as an example).

image

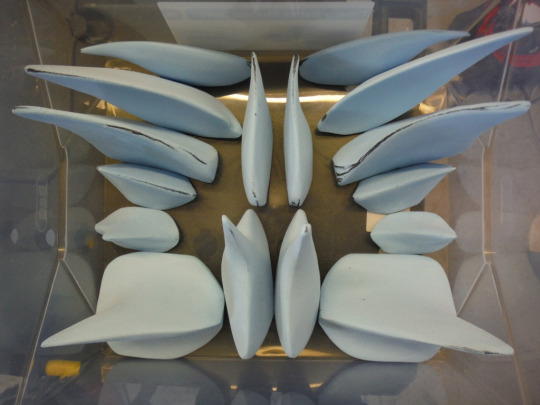
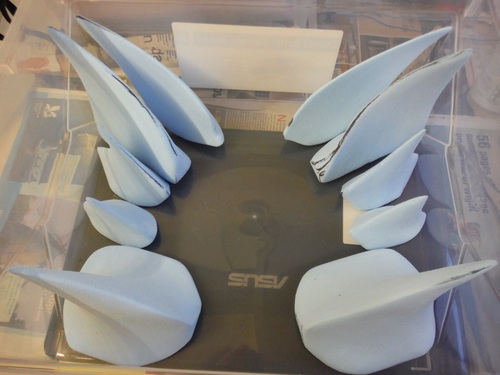
At the end of the day I took a group shot of all the pairs of spines (Cervical - Pectoral, to Caudal) sculpted to date.

Next time I will complete the process of sculpting the remaining Caudal Spines.


Dinosaur Expeditions Open Day

Clifford Wrigley from ‘Wrigley Maintainance’ [email:  wrigleymaintenance2014@gmail.com] is helping us to get all the big jobs done before our Free Open Day on Saturday 28th March.

The Eotyrannus Head display was produced by local artist Nigel George for the Dinosaur Farm Museum in the late 1990s.

Come along to the Dinosaur Farm on Saturday 28th March, enjoy free admission and see the latest fossil discoveries. Talk to our volunteers about the exciting work we do, see live demonstrations of fossil conservation and the creation of original paleoart.

Visit our website for more information:

www.dinosaurexpeditions.co.uk

Polacanthus Reconstruction: Part 10 ‘Splate’

Stegosaurus is famous for the plates that form an alternating row from the neck to the tail. Various hypotheses have been proposed for their function: from defensive armour, thermoregulation (warming / cooling) to visual displays. Their exact function is still open for debate although current research by the Natural History Museum in London on Sophie the juvenile Stegosaurus may well conclude that all three proposals are correct. Just as feathers can be used for insulation, display and flight!

image

Polacanthus and it’s relatives had a diverse range of dermal osteoderms (bony armour). The ‘Splate’ or Spined-Plate is a flat plate like spine with a prominent spike in the middle. 'Splates’ have been found from Polacanthus and Hoplitosaurus. Their exact postion on the body however is a matter of debate (Shoulders, Back, Hip or Tail?) subject to future discovery of an articulated skeleton with a splate to confirm their actual placement.

image

Sadly I don’t have an actual fossil 'Splate’ or plaster cast so I had to base the sculpt on some line drawings and photographs with a scale bar!

Once I had a scaled drawing I traced a copy to make a template and copied this on to the Extruded Polystyrene Foam.

image

With the templates marked out I cut the shapes out of the blue foam and started to sculpt the first 'Splate’.

image
image
image

Given the narrowness of the prominent spine I took my time to sculpt the 'Splate’.

I repeated the process for the opposite spine.

image
image
image
image

With the pair of 'Splates’ finished, my next task will be to sculpt the numerous middle to late caudal tail spines for the Polacanthus model.

Polacanthus Reconstruction: Part 9 ‘Tall Spines’

With the first pair of Caudal (Tail) Spines sculpted I decided to sculpt a pair of spines based on a plaster cast of an unusually tall spine. 

In preparing for the reconstruction of the Polacanthus model I had made some simple line drawings of the spines I had to hand. It was a simple task to produce a just over half scale line drawing as a template. (Note the missing tip was added to the line drawing).

To check the accuracy of the template I placed it on the cast to check the curvature of the spine. So far so good, now I could mark the foam with the outline of the template.

Once the outline was marked on to the foam I carefully cut around the outline and proceeded to carve the first spine. As soon as I had finished the basic shape I compared it with the plaster cast to check the accuracy.

Now it was a case of sculpting the opposite spine of the pair.

(Note the groove on the rear and underside of the spine will be added later on but before the spine is finally mounted, when its final position has been decided).

Happy with the final result, I decided to take a photo of the spines so far!

With the first five pairs completed the next spine to be sculpted will be the spiked shield-like spine known as a ‘Splate’.

Polacanthus Reconstruction: Part 7 ‘Dorsal Spines’

I visited Dinosaur Isle Museum at Sandown on the Isle of Wight and whilst I was there I saw one of the Dorling Kindersley dinosaur models in the lab.

image

The Gastonia model has an original arrangement of spines.

image

The tall lateral (side) spines near the shoulders are quite striking compared with other reconstructions.

image

The model demonstrates the side row of spines from neck to the tip of the tail that formed Gastonia’s primary defense against predators.

image

The tail of Gastonia would have been a formidable weapon against medium to large theropods. Similar in effect to an Aztec Macuahuitl, the keratin covered tail spines would have probably caused significant lacerations to the lower body of any dinosaur unfortunate enough to be in the way of the swinging tail.

Suitable inspired, I returned to the Dinosaur Expeditions Centre at the Dinosaur Farm and decided to focus on producing a pair of dorsal (top) spines, notable for having a solid base.

image

I marked out the template on the foam with the keratin thickness outline added and started carving the shape out.

image
image
image
image
image

Once the first spine was finished I temporarily mounted it on the Minmi model to check how it looked.

image

I still need to blend the spine to match the body but the overall effect is imposing. So I repeated the process to make the opposite spine.

image

Next time I will sculpt a pair of Polacanthus spines based on a rare fossil.